The Clone Stamp tool works by sampling (essentially, replicating or cloning) a portion of an image. You can then apply (or stamp) this sample over other parts of an image. It can be used to clone an entire image or individual element in an image, but is most often used to repair dust, scratches, tears and other image defects.
In this tutorial, for example, we will sample a portion of the background near the stain, and then stamp it onto the portion of the image that contains the stain to make the stain disappear:
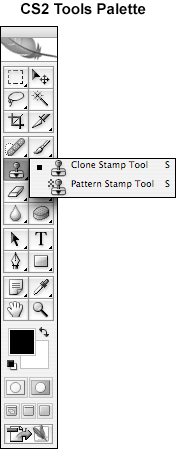
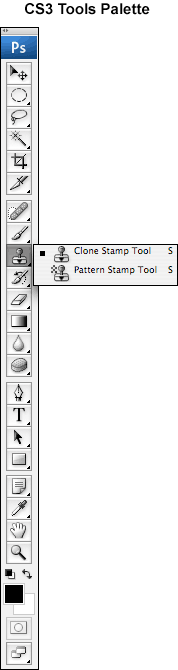
Click on the Clone Stamp Tool in the tools palette to select it:
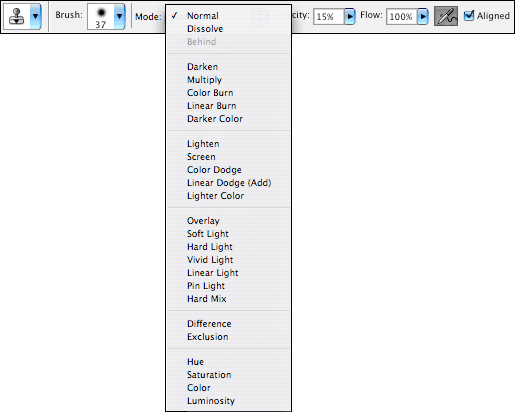
Select your settings in the Clone Stamp Options Bar:

For this tutorial, set the Mode to Normal, Opacity and Flow to 100%, and make sure the Aligned box is not checked.
Pick a nice soft brush from the Clone Stamp Options Bar and with the Clone Stamp Tool selected in the tools palette, hold down the Option key (for Mac) or the Alt key (for Windows), and click once near the area that you want to clone that has similarly colored pixels to establish a source point. In this case, I clicked right below the stain. If your brush is too big or small, pick another brush and OPTION-click again to establish a new source point.
Whenever you OPTION-click on a portion of an image with the Clone Stamp Tool selected, you create a clone of that portion of an image. You “paint” with that cloned portion by simply clicking on the part of the image you want to correct. For the image in this tutorial, I OPTION-clicked to clone a portion of the image beneath the stain, and starting at the bottom of the stain, clicked directly on the stain until it was gone:
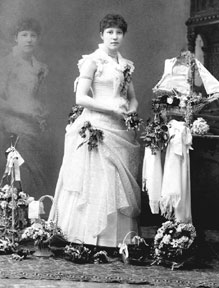
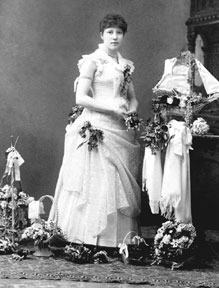
Before:

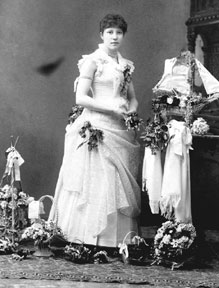
After:
Remember: First, option-click to create the cloned sample (the source point). Then, click on the image to “paint” with the cloned sample.
In the Clone Stamp Options Bar, you have a choice of Aligned and Nonaligned cloning. For this tutorial, the Aligned box is not checked, but you may want to experiment with Aligned cloning (i.e. check the Aligned box) as well. When the Aligned box is not checked, Photoshop applies a cloned sample from the exact same position each time you click until you Option-click again to create a new cloned sample.
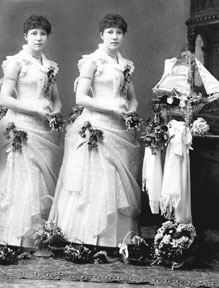
With Aligned Cloning (i.e., check the Aligned box), Photoshop clones continuously, not from the exact same position each time, but rather from a fixed position relative to the position of your cursor. Aligned cloning is frequently used for cloning entire objects or elements in your image. Just Option-click once to set a beginning source point, and then click (or you can also drag with the cursor like you do when you paint) to clone.
In this case, I used a big brush, OPTION-clicked on her face and then started clicking in the background to her left:
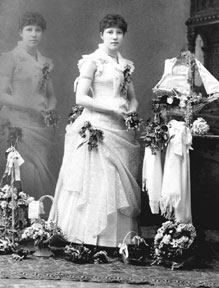
You can create a ghost-like clone if you lower the Opacity to 15% in the Clone Stamp Options Bar:

You can also get some interesting effects if you change the Mode from the drop-down list in the Clone Stamp Options Bar:
Here is the same image with Mode set to Overlay and Opacity at 15%: