Using Layers and the Animation palette, it's easy to make an animated ad (or any gif animation) for the Web in Photoshop:

The animation above was created from these four RGB jpeg graphics:


First, decide on an animated ad/gif animation size. You can find a list of standard Web ad sizes by clicking here.
Next, create your individual animation frames in this animated ad/gif animation size. Save each frame as a separate RGB .jpg file (Maximum quality) and name them Frame1.jpg, Frame2.jpg, Frame3.jpg and Frame4.jpg. If you want to follow along with this tutorial, you can download the individual frames above by clicking on each image and dragging it to your desktop (Mac) or by right-clicking each image and saving it (Windows).
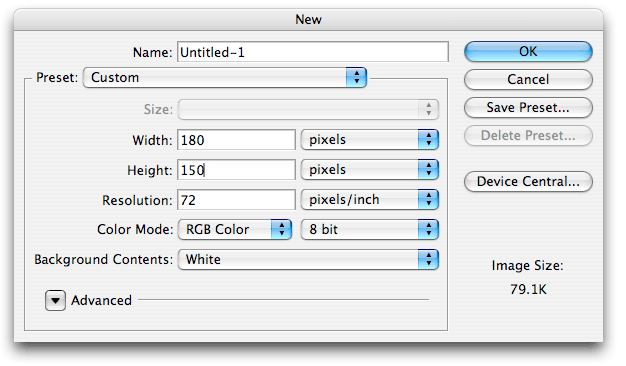
I selected a 180 x 150 pixel "Rectangle" size for this ad. Go to the File menu and select New. In the dialog box that appears, set your Width and Height to your frame animation size (again, I went with 180 by 150 pixels), the Resolution to 72, Color Mode to RGB, Background Contents to White and click OK:
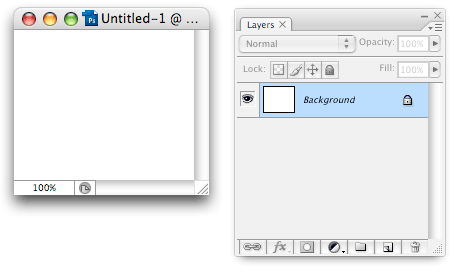
Your new document will appear. This is where you will build your animation:

Make sure your Layers palette is also showing. If it isn't, go up to the Window menu and select Layers:
You want to paste each frame of the animation on a different layer in this new "untitled" window (above).
Open the first frame (Frame1.jpg) of your animation in Photoshop:
- Select it (in the Select menu, choose All, or use the keyboard short cut, Command A in Mac/Control A in Windows).
- Copy it (in the Edit menu, choose Copy, or use the keyboard short cut, Command C in Mac/Control C in Windows).
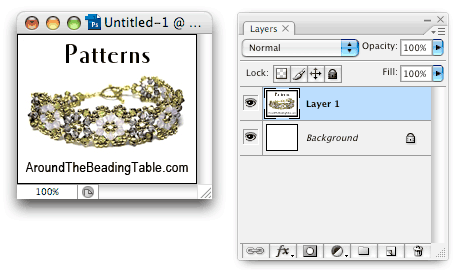
- You can now close Frame1.jpg. Click on your new "untitled" window. Paste the Frame1.jpg image (in the Edit menu, choose Paste, or use the keyboard short cut, Command V in Mac/Control V in Windows).
- Notice that after you Paste, a new layer (called Layer 1) appears in your Layers palette:
Open the second frame (Frame2.jpg) of your animation in Photoshop:
- Select it (in the Select menu, choose All, or use the keyboard short cut, Command A in Mac/Control A in Windows).
- Copy it (in the Edit menu, choose Copy, or use the keyboard short cut, Command C in Mac/Control C in Windows).
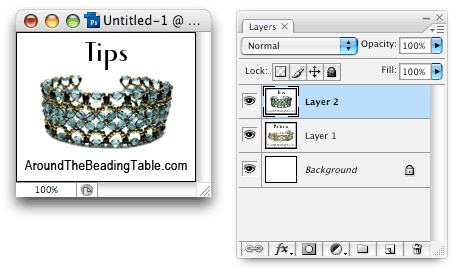
- You can now close Frame2.jpg. Click on your new "untitled" window. Paste the Frame2.jpg image (in the Edit menu, choose Paste, or use the keyboard short cut, Command V in Mac/Control V in Windows).
- Notice that after you Paste, a new layer (called Layer 2) appears in your Layers palette:
Repeat for Frame3.jpg:
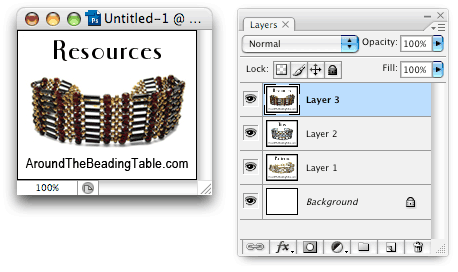
Repeat for Frame4.jpg:
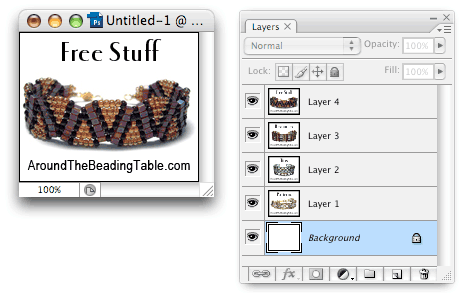
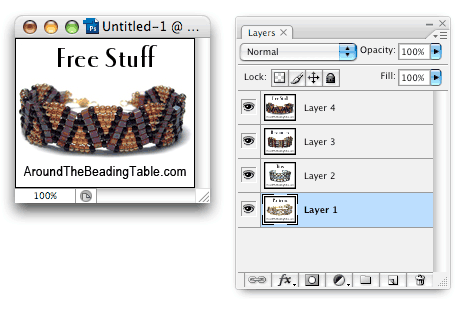
Now that you have all four frames as separate layers, delete the Background layer by clicking on it and dragging it to the trash can icon on the bottom right corner of the Layers palette:
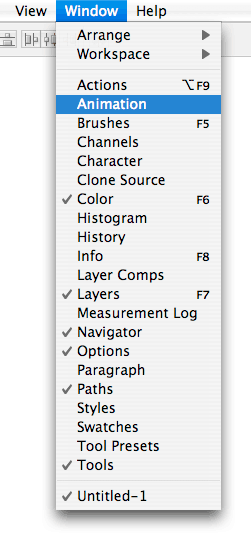
Next open the Animation palette by going to the Window menu and selecting Animation:
The Animation palette will appear:
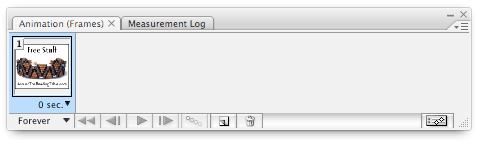
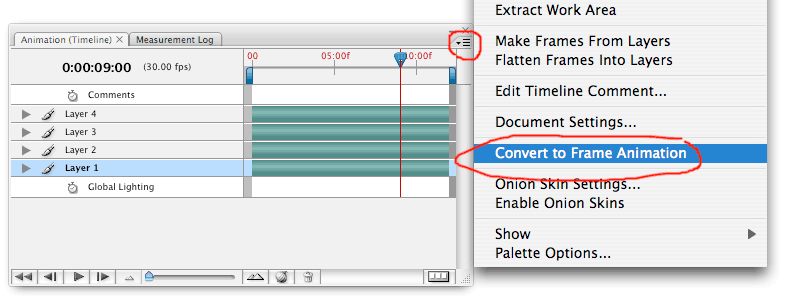
NOTE: Your Animation palette may appear set to Timeline instead of Frame Animation. If your Animation palette looks like the graphic below instead of the graphic above, click on the fly-out menu in the top-right corner (circled in RED) and select Convert to Frame Animation:
Your Animation palette should now look like this:
Click on the Animation palette fly-out menu in the top-right corner (circled in RED) and select Make Frames From Layers:
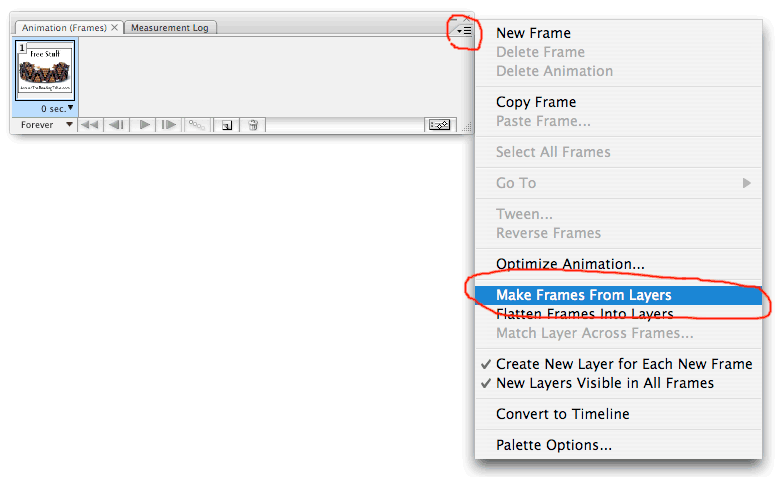
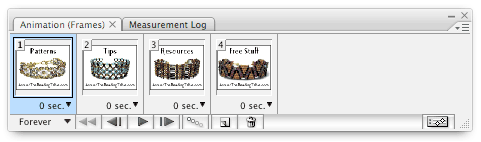
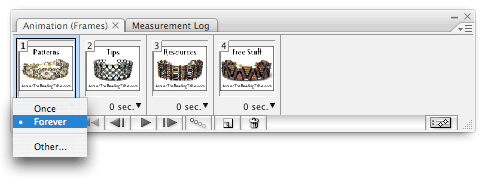
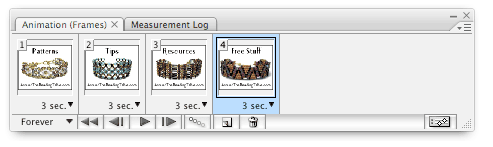
Now your Animation palette will now show all four layers as animation frames:
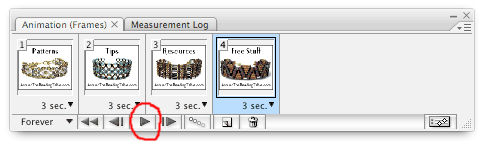
If you want your animation to loop continuously, make sure Forever is showing in the drop-down menu at the bottom left corner of the Animation palette. You can also make your animation loop Once or as many time as you specify under Other:
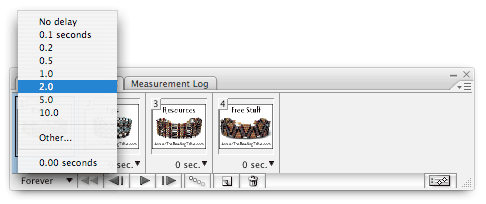
Next you want to set how many seconds each frame will show (Frame Delay) until the animation jumps to the next frame. Click on the triangle right under each animation and select from one of the defaults or choose Other to set your own Frame Delay amount:
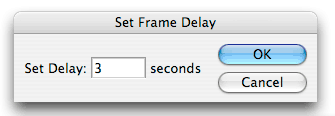
When you select Other, a dialog box will appear where you can set your own Frame Delay amount. I've decided on 3 seconds for each frame. NOTE, you must set the Frame Delay for each animation frame but the value for each frame can be different:
You can play your animated ad/gif animation by clicking on the Play button (circled in RED) on the Animation palette:
Now as a final step, you will save your animation as an animated gif. First, save your layered file in case you want to make changes later. I saved my layered file as a layered tiff called animated_layerered.tif.
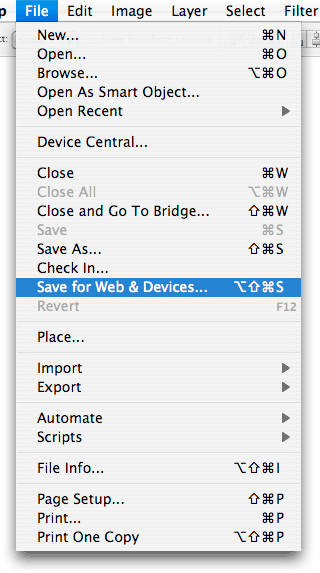
To create your animated ad/gif animation, go to the File menu and select Save for Web & Devices:
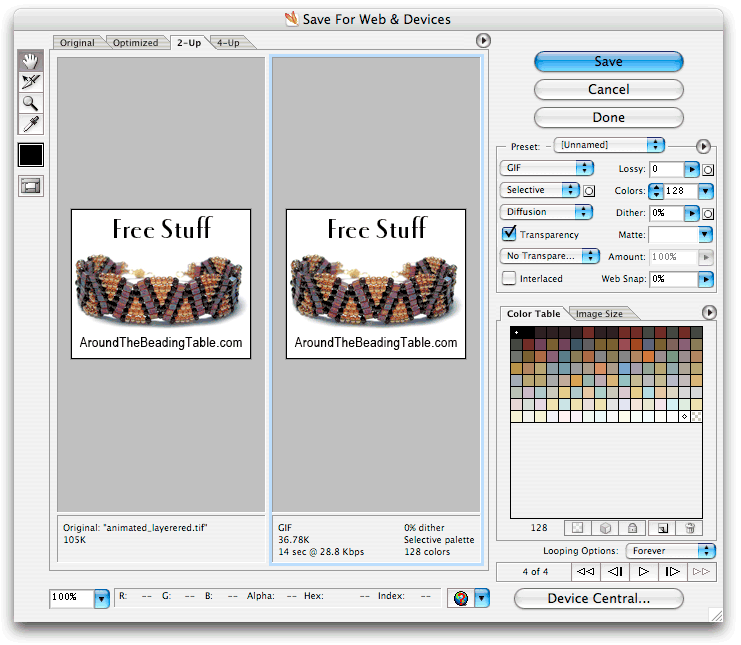
The following dialog box will appear. Your dialog box may look different depending on the settings you last used. Most important is that GIF is selected in the drop-down menu right below Preset. The rest of the settings below always seem to work well for me but you should experiment with them on your own. Click Save, name the gif (and make sure you keep the .gif file extension at the end of the name) and save it to your hard drive:
To view your animated ad/gif animation, drag it into an empty browser window.
NOTE: If you open this animated ad/gif animation in Photoshop, you will see just the first frame, no layers and it will not animate. This is why it is essential that you keep the layered file used to make your animated ad or gif animation so that you can remake the animation later if you want to change it. (NOTE: Adobe Photoshop CS5 now has full animated .gif support so that animations can be opened with layers and settings intact.)