Often times, when you scan an image of person, you end up with flesh tones that are too red. There are a number of ways to beat the beet-red face in Photoshop. This method uses the Hue/Saturation command.
Go to the File menu and Open the image you want to work on. For this tip, I'm using the following example:

The Hue/Saturation command allows you to increase or decrease an image's hue and saturation. Hue is essentially a color (such as red or green) and Saturation refers to the intensity of that color (increase the saturation of pale pink and you get hot pink). The Hue/Saturation command also allows you to increase or decrease the hue and saturation of just a particular range of colors in an image (i.e. the Reds, Yellows, Greens, Cyans, Blues, Magentas).
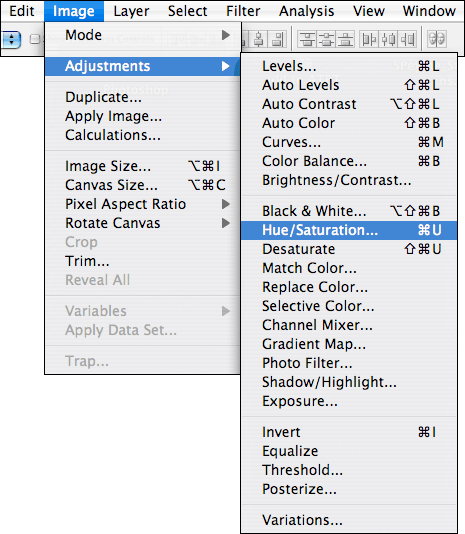
To bring up the Hue/Saturation dialog box, go to the Image Menu, scroll down to Adjustments, and in the pop-up menu, select Hue/Saturation. You can also use the keyboard shortcut: Command U for Mac; Control U for Windows.

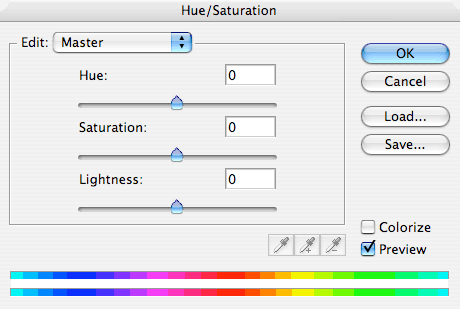
The Hue/Saturation dialog box will appear:

Make sure the Preview box is checked but do not check the Colorize box.
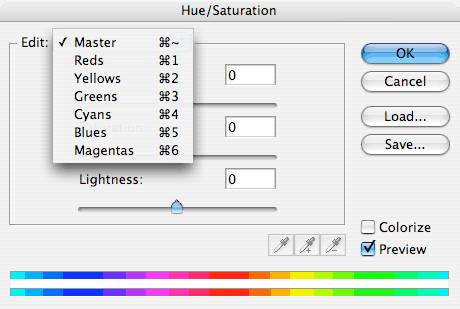
Master is the Edit drop-down menu default. If you leave Master selected, you will change the hue and saturation for all of the colors in your image (which you very rarely want to do). Click on the little triangles to the right and a drop-down menu will appear with the following selections: Reds, Yellows, Greens, Cyans, Blues, Magentas.

For this tip, we want to decrease the amount of red so scroll down to the Reds in the drop-down menu. Move the dialog box so you can see your image in the background. Watch what happens to your image when you decrease (move the slider to the left) the Saturation. You can also increase (move the slider to the right) the Lightness. You can eliminate the yellow jaundiced look by selecting the Yellows, and decreasing the yellow Saturation. Here is the before and after:

